Riepilogo rapido
Riepilogo rapido: Natural stone slab photos should be reviewed for color range, vein direction, slab number, finish, thickness, defects, layout use, and packing notes before a project order is confirmed. For marble, granite, and quartzite projects, a clear photo review reduces surprises between material selection, cut-to-size production, and final installation.
How to Review Natural Stone Slab Photos Before Confirming a Project Order
Natural stone does not behave like a printed surface. Two slabs from the same bundle can still show different veining, mineral movement, shade, crystal density, and background tone. That variation is part of the material, but it also means project teams should not approve stone from one close-up photo or a small sample alone.
A proper slab photo review helps connect the material choice with the drawings, cutting plan, installation area, and final room effect. It is especially important for hotel lobbies, villa floors, bathroom walls, stair pieces, reception counters, kitchen islands, vanity tops, and large wall panels. In these areas, one slab may be split into many pieces, and a small visual mismatch can become obvious after installation.

FOR U STONE works across natural stone products, stone materials, marmo, granito, quarzite, and custom project applications. For these materials, slab photos should be treated as a project document, not a simple sales image. They should help answer whether the actual slabs fit the design, the cutting sequence, and the expected finish.
Industry references support this practical approach. ASTM C1528 is written for the selection of dimension stone in construction applications, and the Natural Stone Institute’s Dimension Stone Design Manual is widely used as a technical reference for natural stone design and workmanship. Those documents do not replace project drawings or supplier review, but they point to the same principle: stone should be selected with its intended use, performance needs, and visual acceptance in mind.
1. Why slab photos matter before a natural stone project order
A slab photo is useful because it shows the real material batch, not only the quarry name or product name. Natural marble can show cloudy patches, heavy veins, small fissures, or strong background changes. Granite may have mineral concentrations, darker movement, or directional structure. Quartzite can show crystal bands, translucent areas, dramatic veins, or color shifts across the slab face.
For a single vanity top, these differences may be manageable. For a lobby floor, feature wall, stair package, hotel bathroom program, or villa floor order, the same differences can affect the whole project. If the slabs are not reviewed early, the problem may appear after cutting, when there is less room to change the layout.
A good slab photo review also protects communication. Designers may judge the stone by color and movement. Contractors may look at dimensions, thickness, finish, and breakage risk. A stone import company may focus on bundle numbers, labels, packing, and whether the selected pieces match the purchase order. Reviewing the same photo set gives every side a clearer basis for approval.
The goal is not to make natural stone perfectly uniform. The goal is to understand the range of the selected slabs before money, cutting time, and shipping space are committed. That is why a project order should ask for complete slab photos, not only attractive close-ups.
2. Start with full-slab photos, not close-up beauty shots
The first photo set should show each full slab standing upright or laid flat, with the entire surface visible. A close-up can be helpful later, but it cannot show vein direction, usable area, edge condition, slab shape, or whether two slabs can be matched. For project review, a full-slab photo is the primary image.
Each full-slab image should show the slab number or bundle label. The label matters because project approval often depends on exact piece selection. If the design team approves slab A but production cuts slab B, the finished result may look different even if both pieces have the same material name. Slab labels make the approval traceable.
Photos should be taken in stable lighting when possible. Strong yellow warehouse lighting, deep shadows, wet surfaces, and edited contrast can change how a stone looks. A useful photo set often includes one straight-on full view, one angled view to show surface finish, and several detail shots for veins, fissures, resin lines, mesh backing, or special texture.
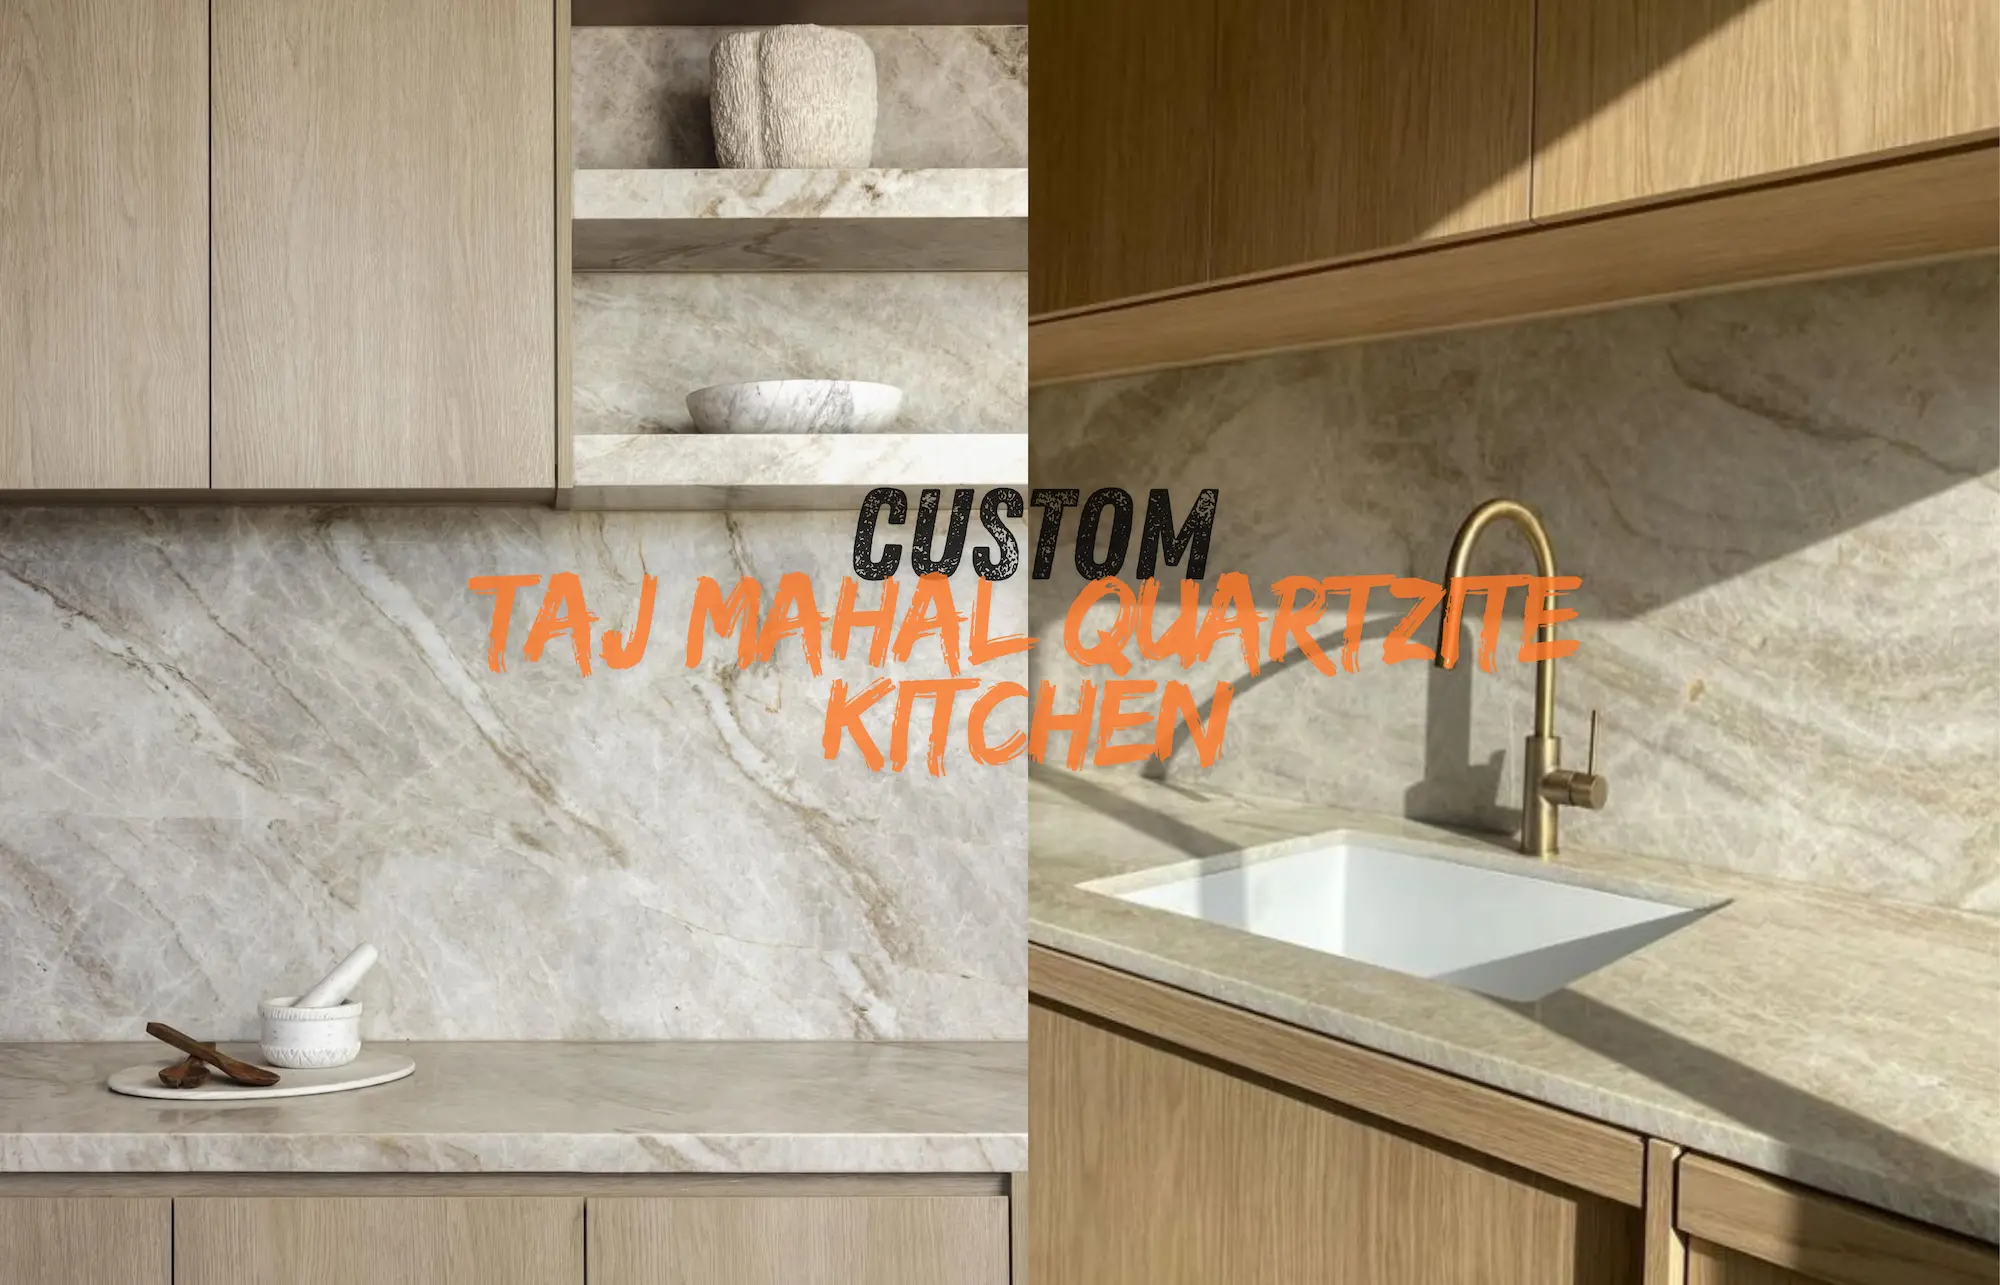
For large-feature stones such as lastre di quarzite esotica, full-slab photos are even more important. A dramatic vein may be beautiful on one piece but difficult to use if it falls through a sink cutout, across a stair nosing, or into the wrong side of a bookmatched wall.
3. Check color range before checking pattern
Many project problems begin with color, not veining. A stone can have an acceptable pattern but still feel wrong if the background tone shifts too far from the approved sample. White marble may lean warm, cool, grey, cream, or slightly yellow. Beige travertine can move from light ivory to deeper walnut. Black granite may show gold, silver, white, green, or brown minerals depending on the slab.
When reviewing slab photos, compare the full batch as a group. Do not approve the best single slab first. Place the images in order and look at the lightest, darkest, warmest, and coolest pieces. If the range is too wide for the intended area, ask whether the order can be narrowed to a tighter selection.
For flooring, wall panels, stairs, and bathroom sets, color range affects how pieces sit next to each other. A darker slab can be used in a lower-visibility area if the cutting plan allows it. A highly different slab may need to be removed from the selection. The earlier this is decided, the easier it is to adjust the project layout.
Color review should also consider the final finish. A polished finish usually makes color deeper and reflection stronger. A honed finish can soften reflection and make some veining appear calmer. A leathered or brushed finish can change how the surface catches light. If the slab photo shows a different finish from the final order, ask for a finish sample or a small processed photo before approving the batch.
4. Read vein direction like a layout drawing
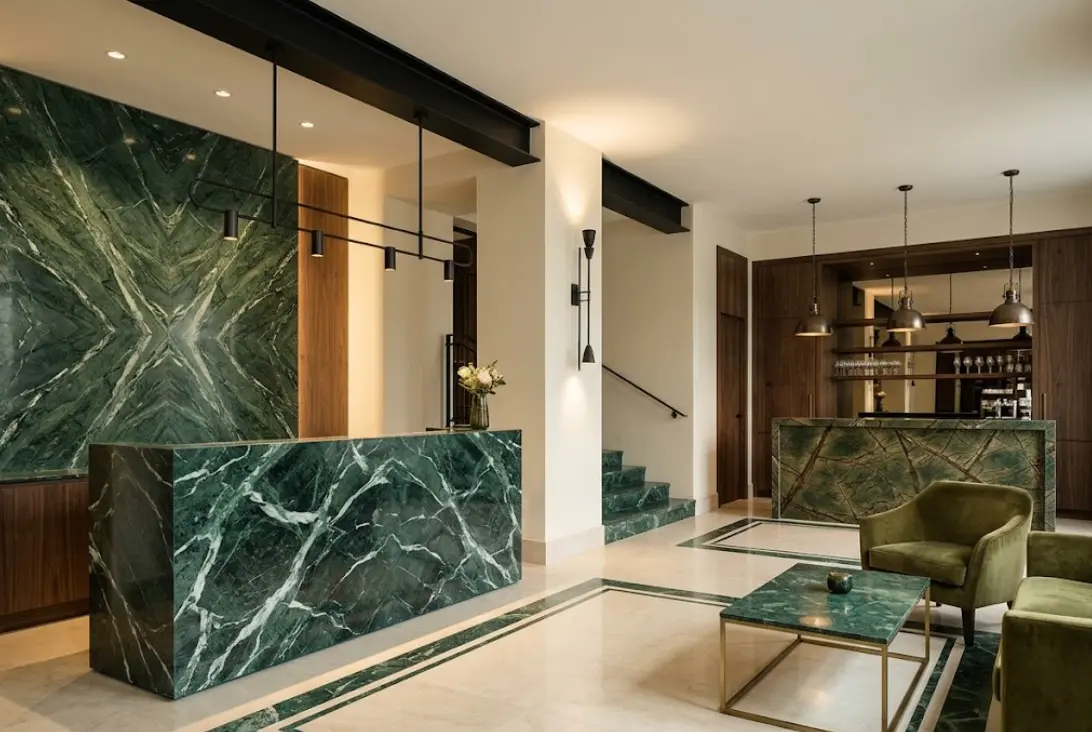
Vein direction is not only a design detail. It affects how the finished project reads across countertops, islands, wall panels, floors, and stair treads. If several pieces are cut from one slab, the project may need the veins to continue in one direction. If the material is used in a bookmatched wall, the slab sequence becomes part of the design.
For countertops and vanity tops, check where the strongest veins will fall. A vein through a sink, faucet hole, cooktop opening, or mitered edge may be acceptable, but it should be seen before cutting. For a waterfall island, the vein direction should be reviewed from the top and down the side. For a reception desk, the front face usually matters more than the hidden return.
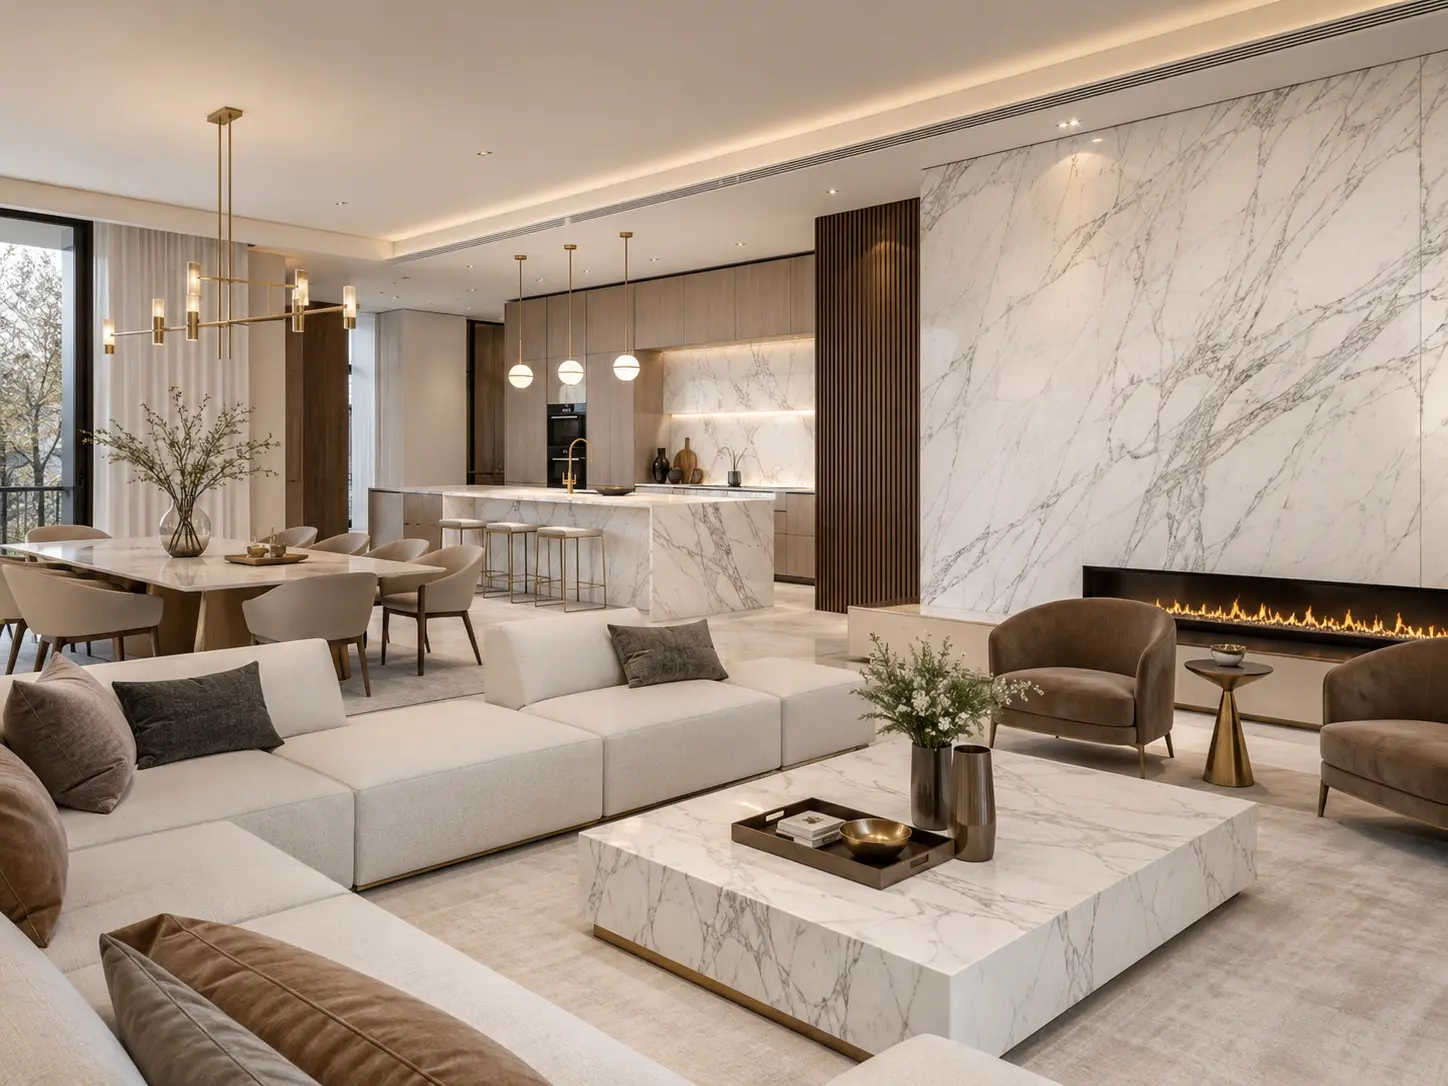
For flooring, large veining can either organize the space or create visual noise. A hotel lobby floor may need a controlled direction so the stone leads the eye toward the reception area. A villa hallway may need calmer movement to avoid looking uneven under long lighting lines. A bathroom wall may need the veins balanced around mirrors, niches, and vanity positions.
When reviewing photos, mark the intended use on each selected slab. The same quartzite or marble slab may be perfect for a feature wall but too active for small floor tiles. A plain granite slab may be less dramatic in photos but better for high-use stair pieces or thresholds.
5. Confirm slab size, thickness, and usable area
Slab photos should be reviewed with actual dimensions. A beautiful slab is not useful if it cannot cover the required pieces after cutting, trimming, and defect avoidance. The project team should confirm length, width, thickness, quantity, and whether the measured area is enough after allowing for edges, pattern direction, and cutting waste.

Thickness should match the application and drawings. Common slab thicknesses such as 18 mm, 20 mm, and 30 mm may appear similar in photos, but they affect fabrication, edge detail, weight, installation method, and packing. For wall panels or large vertical pieces, the support system and local installation requirements also matter.
Usable area is different from gross slab area. A slab may have chipped corners, cracks near the edge, resin-filled lines, mesh backing, or sections that the fabricator wants to avoid. The photo review should identify whether those areas affect the intended cuts. If the project includes large pieces, ask whether the supplier has marked the usable area or can provide a simple cutting suggestion.
PER U PIETRA piani d'appoggio e piani per lavabi e piani di lavoro in pietra categories show why size and layout should be reviewed together. Countertops often need sink openings, edge buildup, splash pieces, and island panels. The slab image should help confirm where those parts can come from.
6. Look for natural features, repairs, and processing marks
Natural stone can contain veins, pores, pits, fossils, crystal lines, color clouds, open fissures, mineral spots, and filled areas. Some are normal for the stone. Some may need discussion before approval. A photo review should separate expected natural character from issues that may affect cutting, polishing, installation, or acceptance after delivery.
For marble, check whether the slab has heavy fissures, cloudy grey patches, resin lines, or areas that may open during cutting. For granite, look for dark mineral concentrations, chips along edges, and whether the surface finish looks even. For quartzite, pay attention to crystal bands, translucent zones, surface texture, and any natural lines that could be mistaken for cracks.
A repaired or resin-treated area is not automatically a rejection. Many natural stones are reinforced or filled during processing. What matters is whether the repair is stable, visible in the final area, and acceptable for the intended application. For a feature wall, visual acceptance may be stricter. For a hidden cut area, the same mark may not matter.
Ask for close-up photos when a feature is unclear. The close-up should include a ruler, finger, label, or other scale reference when possible. A mark that looks large in a tight crop may be small on the full slab. A thin line that looks harmless in a full photo may need checking if it runs across a sink cutout or stair tread.
7. Match the photo review to the application
The same slab can be suitable for one application and unsuitable for another. That is why photo review should always be tied to drawings, elevations, room use, and installation position. A decorative quartzite with strong movement may work well for a feature wall or bar counter. A calmer granite may be better for public floors, stairs, or service counters.
For hotel and commercial interiors, the review should consider traffic, lighting, cleaning routine, and whether replacement pieces may be needed later. For villa projects, visual continuity between rooms may matter more. For bathrooms, absorption, sealing, slip resistance, wall weight, and edge details need more attention than in a low-use decorative panel.
For exterior stone or anchoring systems, slab photos alone are not enough. ASTM C1242 covers selection, design, and installation considerations for dimension stone attachment systems. The photo can support material review, but engineering, anchorage, backing structure, thickness, and local requirements should be checked through the project specification.
This is why a supplier should receive more than a material name. Send drawings, photos of the target area, finish preference, quantity, project location, and the expected installation position. FOR U STONE’s stone project experience is most useful when those project details are clear before production.
8. Use a simple approval table before production
A written approval table reduces confusion. It does not need to be complicated, but it should connect each slab image with the project use. The table should be shared before cutting begins so the design side, procurement side, supplier, and fabricator can review the same information.
| Review item | What to confirm | Why it matters |
|---|---|---|
| Slab number | Bundle label, slab code, and selected quantity | Keeps the approved material traceable during cutting and packing |
| Gamma di colori | Lightest, darkest, warmest, and coolest slabs in the batch | Prevents unexpected shade changes across floors, walls, or countertops |
| Vein direction | Flow, bookmatch sequence, and intended orientation | Protects the final layout on feature walls, islands, and large panels |
| Finitura | Polished, honed, leathered, brushed, or other surface finish | Changes reflection, color depth, slip feel, and cleaning expectations |
| Usable area | Defects, edge chips, fissures, and areas to avoid | Helps confirm whether the slab can cover the required pieces |
| Project placement | Countertop, floor, wall, stair, vanity, island, or lobby area | Connects the photo review with the actual installation condition |
9. Related Stone Project Guides
10. Checklist before approving slab photos
- Ask for full-slab photos of every selected piece, not only close-up images.
- Check that each photo includes a slab number, bundle label, or clear identification mark.
- Compare the whole batch for color range before choosing the best single slab.
- Confirm whether vein direction matches the intended cutting plan and installation position.
- Ask for close-up images of fissures, resin lines, chips, repairs, and special natural features.
- Confirm slab size, thickness, finish, and usable area before approving production.
- Share drawings or a simple layout plan so the supplier can connect the photos with the project use.
- Record approval decisions in writing before cutting, packing, or shipment.
11. FAQ of Natural Stone Slabs
1. What should I check first in natural stone slab photos?
Start with full-slab photos that show the entire surface, slab number, color range, vein direction, and edge condition. After that, review close-up photos for fissures, repairs, pores, chips, resin-filled areas, and finish texture. A full photo gives the project context, while detail photos help confirm whether specific natural features are acceptable.
2. Are close-up slab photos enough for approving marble or quartzite?
Close-up photos are not enough for approving marble or quartzite project slabs. They can show texture and detail, but they do not show full movement, usable area, color range, or how several slabs work together. Use close-ups only after full-slab photos, labels, dimensions, finish information, and intended application have been reviewed.
3. Why do slabs from the same natural stone batch look different?
Natural stone forms with minerals, pressure, heat, and geological movement, so slabs from the same batch can still vary in color, veining, crystal structure, pores, and background tone. That variation is normal, but project teams should review the full batch before production so the selected pieces match the design area and cutting plan.
4. Should slab photos be approved before cut-to-size production?
Yes. Slab photos should be approved before cut-to-size production because cutting fixes the usable pieces, vein direction, layout choices, and defect avoidance strategy. Once the stone is cut, changes become more difficult and may require extra material. Approval should include slab number, size, finish, project placement, and any areas to avoid.
5. What information should be sent with drawings for a stone order?
Send the drawings, material name, preferred finish, slab thickness, quantity, room or application area, installation position, edge details, packing needs, and project location. If the order includes countertops, wall panels, stairs, or bookmatched surfaces, mark those areas clearly. This helps the supplier connect slab photos with production and delivery planning.
12. Final Conclusion
Natural stone slab photos should be reviewed as part of the project approval process, not as decoration. A useful review checks the full slab, label, color range, vein direction, finish, size, thickness, usable area, repairs, and final application. This is the step where design expectations meet the actual material that will be cut, packed, and installed.
For marble, granite, quartzite, travertine, countertops, walls, floors, stairs, and lobby projects, the safest decision is to connect every approved slab photo with a drawing or layout note. That keeps the order traceable and makes it easier to discuss whether a specific slab belongs on a feature wall, countertop, vanity top, floor area, or less visible cut piece.
Natural stone project procurement guide
Use this complete guide to connect material selection, slab approval, drawings, inspection, packing, and export-ready delivery.

Ask FOR U STONE to review project slabs with your drawings
Send the target material, drawings, finish, thickness, quantity, application area, and project location. FOR U STONE can help review marble, granite, quartzite, travertine, and custom cut-to-size stone options with slab photos, layout notes, and practical production details before the project order moves forward.
Riferimenti
- Title: Dimension Stone Design Manual 2024, Author: Natural Stone Institute Technical Committee, Institution: Natural Stone Institute, Source: Natural Stone Institute Resource Library.
- Title: ASTM C1528/C1528M Standard Guide for Selection of Dimension Stone, Author: ASTM Committee C18 on Dimension Stone, Institution: ASTM International, Source: ASTM Standards.
- Title: ASTM C503/C503M Standard Specification for Marble Dimension Stone, Author: ASTM Committee C18 on Dimension Stone, Institution: ASTM International, Source: ASTM Standards.
- Title: ASTM C615/C615M Standard Specification for Granite Dimension Stone, Author: ASTM Committee C18 on Dimension Stone, Institution: ASTM International, Source: ASTM Standards.
- Title: ASTM C616/C616M Standard Specification for Quartz-Based Dimension Stone, Author: ASTM Committee C18 on Dimension Stone, Institution: ASTM International, Source: ASTM Standards.
- Title: ASTM C97/C97M Standard Test Methods for Absorption and Bulk Specific Gravity of Dimension Stone, Author: ASTM Committee C18 on Dimension Stone, Institution: ASTM International, Source: ASTM Standards.
- Title: ASTM C1242 Standard Guide for Selection, Design, and Installation of Dimension Stone Attachment Systems, Author: ASTM Committee C18 on Dimension Stone, Institution: ASTM International, Source: ASTM Standards.
- Title: ASTM International Standards Referenced in the Dimension Stone Design Manual, Author: Natural Stone Institute Standards Team, Institution: Natural Stone Institute, Source: Natural Stone Institute Professional Resources.